this is one of my favorite ways to recycle an old book into a journal. with the new year i thought it was a good time to start a new journal, and also kick off my participation in
project restyle. enjoy!
MATERIALS!
 |
- old book (libraries often give away free older books perfect for this project)
- glue stick
- needle and embroidery thread
- scissors
- glue stick
- tape
- about 25 sheets of paper (make sure they are the right size for your book)
- paper
- ruler
- pencil
- poker thing (i don't know what else to call it...)
- razor blade.
|
 |
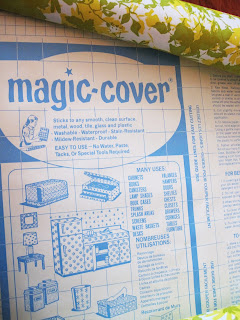
| for covering the book, i used this "magic cover" wall and appliance sheet that i found at a thrift store, but any sort of paper will do. |
 |
| first, remove the book cover if it has one, and use a razor blade to remove the pages. cut along the seam of the binding on each side, making sure not to cut through the cover of the book. |
 |
| now you should have just the shell of the book. place the pages aside. |
 |
| now simply wrap the cover of the book in paper or, "magic cover" as i did. the "magic cover" made the process simple because there was no gluing or wrinkles. if you are using paper and glue make sure that you have allowed enough flexibility to close the book. |
 |
| cut the corners diagonally (as shown on bottom) when wrapping for a smooth corner. |
 |
| once your book is beautifully wrapped cut a piece of paper to fit the inside cover. |
 |
| use a glue stick to apply. |
 |
| ta da! you have finished the shell! |
 |
| now for the binding! return to the pages of the book and cut a strip for the hole pattern. the strip should be the same length as the pages of the book. |
 |
| use a ruler to make your binding hole pattern. i did five lines evenly spaced (about a quarter of a centimeter), with holes every 3 centimeters and 1 centimeter. this part can vary, and will depend on the thickness of your book cover's binding. (a fatter binding will take more lines) |
 |
| place your hole pattern on the seam of your shell. use a small piece of tape to keep it in place. |
 |
| use your poker thing to poke through the holes where you will sew. (if you don't have a "poker thing" an embroidery needle should work) |
 |
| your seam should look something like this. |
 |
| depending on how many lines of holes you made, you will fold sets of paper to bind. i had 5 lines so i made 5 sets of paper with 4-5 pieces of paper for each. i used mostly 8 by 11 paper, but it's fun to mix it up with different sizes and types of paper. |
 |
| make sure you have a crisp fold |
 |
| now, use your hole pattern to mark holes in the fold of your sets of paper. |
 |
| now you can easily sew each set of paper into a line of holes on your shell. |
 |
| once you have finished a row, make sure it is tightly sewn, then tie it off. repeat for each set. |
 |
| now you have a lovely journal! |
 |
| you can decorate your journal, however you please... |
here are some of my past project journals:


this is extremely cool :)
ReplyDelete